How To Enable The No Charge Module And How To Take No Charge Orders In POS
What is a No Charge Account?
This account is used for the employees of the restaurant or the guest for which you do not wish to charge(i,e guests on fullboard or halfboard). You can use this order as a complimentary for persons like Restaurant Staff, Manager, or Owner of the Restaurant
How to Access:
Please find the below steps to manage A No charge account and an order
Active No Charge Module
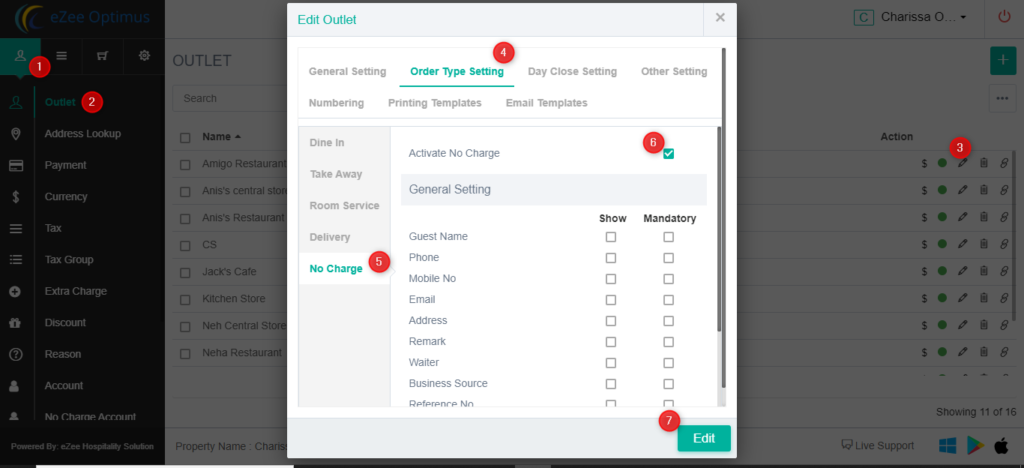
Location: eZee Optimus >> Go to Back >> Master>>Outlet>> Add/Edit
Step 1: You need to activate No charge order type from the outlet
General Setting: You can set mandatory details for report purpose
Auto Extra charge Setting: Keep auto posting extra charge (Optional)
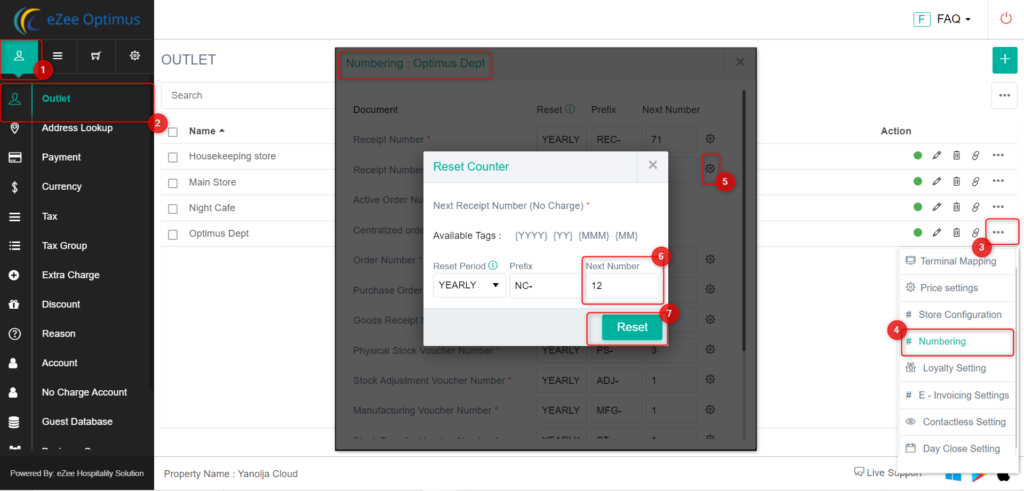
Step 2: Configure No charge order receipt numbering. No Charge orders will follow different prefixes and receipt number
Add No Charge Account
Location:eZee Optimus >> Switch to Back >> Master>>No Charge Account
Step 1: Add a No Charge Account to manage No Charge Orders
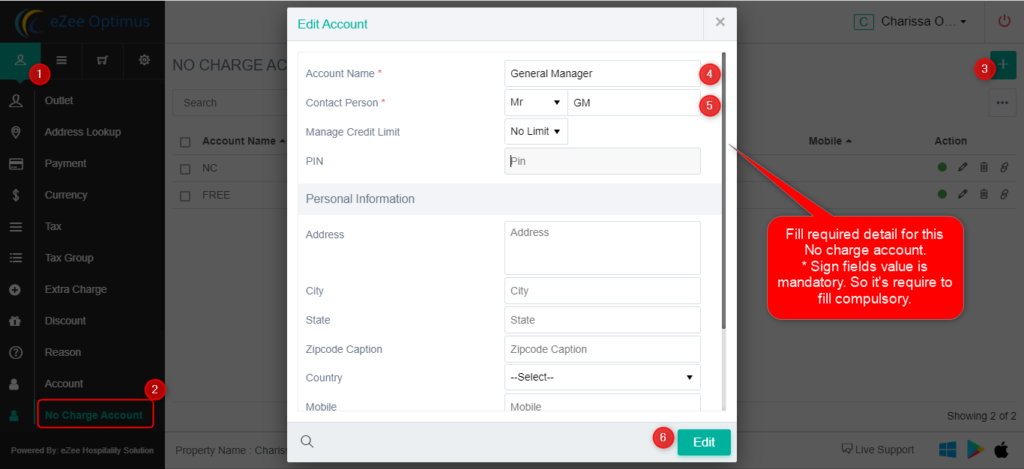
- Account Name: No charge Person Name
- Contact Person: Contact person name
- Manage Credit Limit: No limit, Daily, Monthly, or on order configure the credit limit to post bills on the account
- Pin: Configure pin to use this account as a settle receipt
Personal Information: Add Address, Email, Reg. No., City, State, Mobile, Email, etc
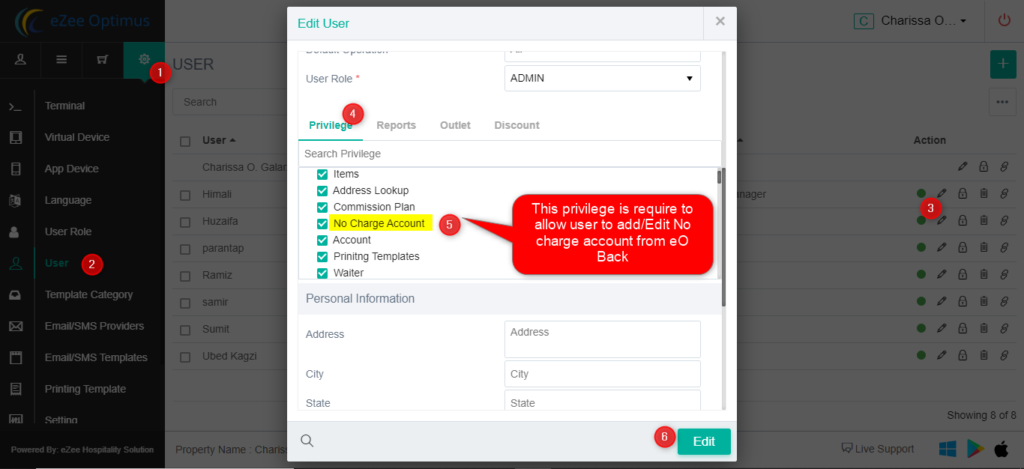
Use Privilege
Location: eZee Optimus >> Switch to Back >> Settings >> User >> Privilege >> Front Office >> No charge

Location: eZee Optimus >> Switch to Back >> Settings >> User >> Privilege >> Back office >> No charge Account
NO Charge Order process:
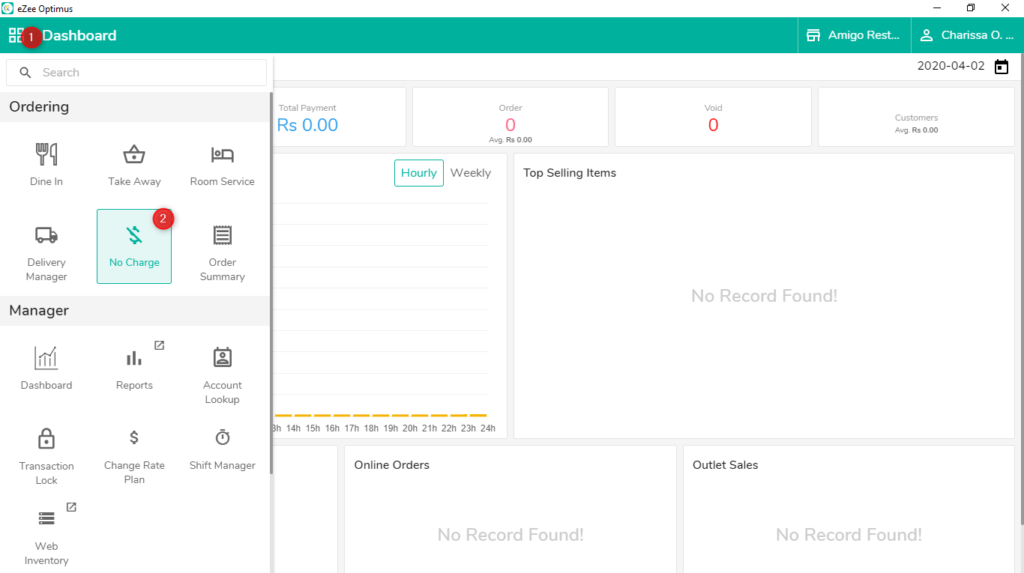
Step 1: Select the No Charge order type from the Dashboard by referring below screenshot
Step 2: Select the NC account along with the guest name

Step 3: Select the order detail and click on the save button to confirm that the NC order

Step 4: Select the NC account along with the guest name

Settle DineIn order type to NC account:
Step 1: Take Dine-In order from the Dashboard.
Step 2: Fill Waiter and Guest Detail and save that order information to add menu items

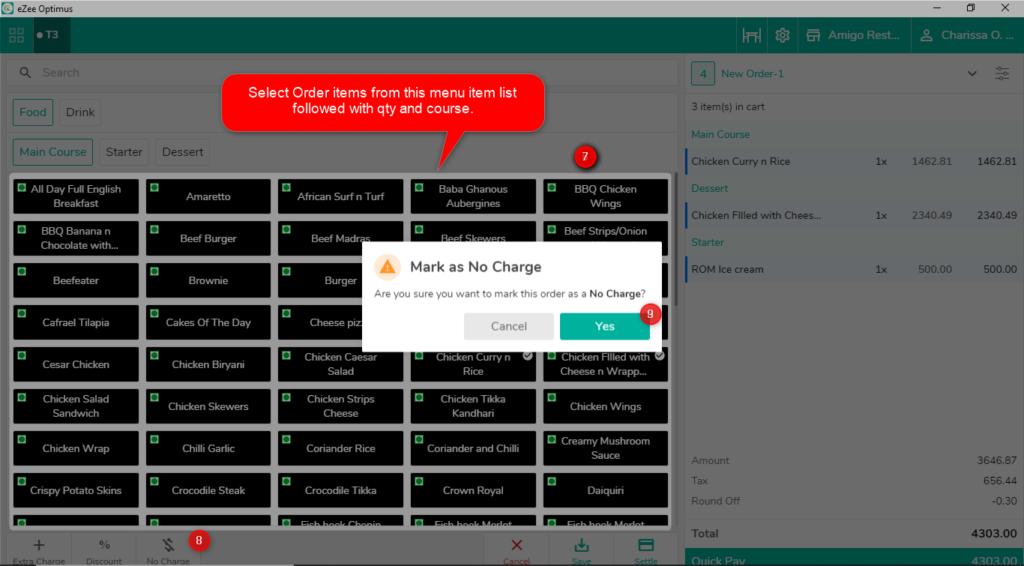
Step 3: Add items from the menu and click on the No Charge button as per the below screenshot.
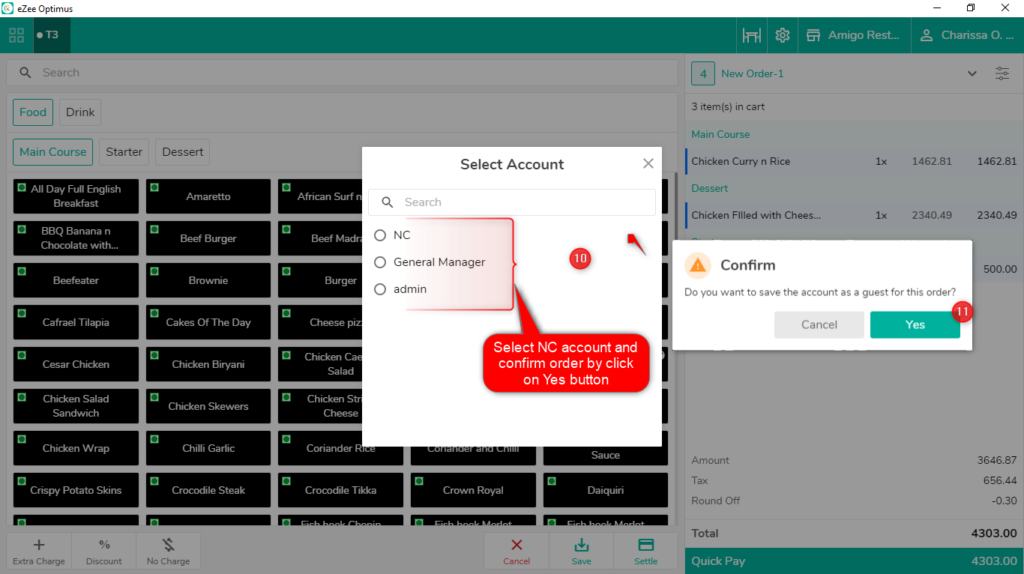
Step 4: Select NC Account and confirm the order to finish that NC order.
Step 5: We can view that NC order from Dashboard >> Order Summary

Related Articles
How to Merge Orders in POS
What does the Marge Option do? If we wanted to combine different orders, we can use the merge option on the Optimus side. How to perform the merge Operation Step 1: Click on the Order summary Step 2: Now, choose the orders you wish to merge and click ...How to Split Orders During Payment
What is Split Receipt? Let’s assume, a group of friends has visited the restaurant, they prefer to split the bill among the number of persons available on that table as they want to make the payment only for the menu item they have consumed or ...Stock Ledger Report in POS
What is a Stock Ledger Report? A Stock Ledger Report is a detailed record of all transactions affecting inventory items in an organization. It tracks all changes in stock levels due to various operations such as stock in, stock out, stock ...How to Perform Indent/Requisition in POS
Q: What is Indent ? Ans: Indent is basically a list raised by employees of an Main Store asking for materials needed which are present in the store. The indents can be raised by any employee when he requires item from the stores. Q. How to Create an ...How to add menu item BOM( Bill of material/ Inventory Consumption) in POS
What is menu item BOM - Inventory Consumption? When we punch menu item in the outlet, our store item got reduce to make item. Set menu item BOM to manage inventory consumption. Example, Sell a sandwich from POS so we will add sandwich's ingredients ...